Monthly Archives: November 2009

DIY Portable Fake Fire Effect

Flame lights like the Le Maitre “Le Flame” and the Chavuet “Bob” are pretty decent flame effects, but there’s one small problem with them, and that’s that they have to be plugged into a power source.  A couple years ago I helped a theater put together a portable fire effect since their show called for an actor to carry around a metal trash can that he would eventually “burn” some paper in.  Unfortunately I didn’t take any photos of what we put together, but I’ll run down it here since it’s relatively straightforward.

The key to a good portable fire effect is having a decent power source.  Most modern theaters likely have one readily available, and if the theater doesn’t then you’re bound to find that you or a friend already has one.  Here’s a hint:
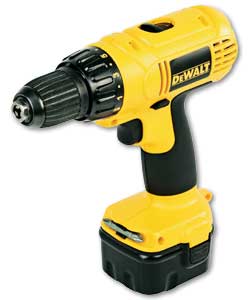
dewalt-12v-cordless-drill

The battery pack from most cordless tools should provide you with an excellent power source.  The reason you want to use a battery pack like this is because you need a compact power source that provides enough current to power both a fan and multiple halogen lights.  Since these batteries provide enough current to provide decent torque for drilling, sawing, etc. then it’ll also power a fan & lights without any problems.  On top of the battery pack you’ll want a few other things:

  • One or two 12 or 24 volt (depending on your power source) MR-16 halogen bulbs, either clear or red/orange.
  • A 12-volt fan.  You can cannibalize one from an old PC or buy one from a local computer supply store.
  • A piece of very light white fabric, preferably silk.  If you don’t have any readily available you can buy replacement silk for commercial fire effects for about $10.  Google will provide you with plenty of sources.
  • Some wire, a small switch, and a couple alligator clips.
  • Whatever you want to mount the fire effect in (a small trash can, etc. or even just a small framework that can be easily moved).

Simply mount the fan in the trashcan about two inches below the lip. Make sure it’s mounted so the airflow is upwards, out of the trash can.  You’ll also want to mount a couple of fins on opposing corners of the fan in such a way that they partially disrupt the airflow of the fan.  If you don’t do this then when you turn on the fan the silk will simply stand straight up in the column of air coming from the fan and won’t look like a natural flame at all.

Once you have the fan mounted I suggest you hook it up to the battery and test the silk. If you bought a replacement silk for a commercial flame effect then it likely has magnets glued to its base that you’re supposed to use to attach it to the flame effect.  If you used pieces of metal for your fan fins then you should be able to attach the silk directly to them.  You may need to cut the silk to fit your needs, and also spend some time adjusting the fins to ensure the silk flutters sufficiently to look like a realistic flame.

Mount the MR-16 lights on opposing sides, angled inward to a point towards the silk.  If you have white bulbs then you’ll probably also want to attach some colored  gel to the lights.  Wire the bulbs and fan in parallel, routing them through a switch.  Mount the switch somewhere around the lip of the trashcan where it can be easily flipped by an actor without being seen.  Use alligator clips to connect the appropriate leads from the fan/lights and the switch to the battery and you should be all set.

One word of warning: The 12-volt MR-16 halogen bulbs can get hot very quickly.  Make sure they’re properly insulated and also make sure anybody handling the flame when in use is aware that they’ll heat up.

DIY Fake Fireplace Effect

I recently was asked to put together a fake fire effect for a small community theater. They wanted a fireplace full of burning embers, not a full flame effect that can be done with flame lights.  To create this effect you basically need two things: a light source that flickers like a flame and something translucent that looks like burning embers that will flicker in the light.

I initially did some searching for fire glass to see if there were any readily available products to simulate burning embers, but didn’t have any luck finding anything that looked realistic enough.  Eventually I came up with the idea of trying to make my own, and with a little more research I came across a handy tutorial that demonstrates how to make fake ice cubes out of plastic.  I ended up using that as a template for making my own fake burning embers, expanding on the concept by including colored plastic in my fake ice cubes.  Here’s a quick tutorial:

Go to your local hobby shop and purchase some clear plastic beads.  Kyle, the guy behind the ice cube tutorial bought his at WalMart.  I found mine at AC Moore, a craft store chain with stores all along the East Coast.

Beads

Get some sheets of lighting gel, preferably a few different shades of orange/red.  If you don’t have a ready supply of gel then you can order some on-line from places like Production Advantage.  Depending on how much you need to make you might not need entire sheets of gel so you might want to see if you can get one or more companies to send you a sample swatch book for free.

You’ll want to shred the gel(s) into small pieces in order to mix it up with the plastic beads.  I ran a few small sheets of orange & red gels through my paper shredder:

DSC_0008

Make some forms out of aluminum foil in various shapes (you don’t want all your embers to be 100% identical).  I used things like batteries, a flashlight, and small cardboard boxes as forms, wrapping aluminum foil around them.  Then fill the form up with a mix of plastic beads and strips of the shredded gel.  Don’t overdo it with the gel, at least at first.  You probably want to experiment a bit to figure out the right mix:

DSC_0019

Fill up the form with more plastic beads, then place it in an oven at 400 degrees for approx. 20 minutes.  You should keep an eye on it to make sure the form doesn’t leak and the beads are melting.  If the beads aren’t fully melted after 20 minutes just leave them in the oven longer and consider turning up the heat slightly.  The gel strips have a much higher melting point (after all, they have to sit directly in front of 1000 watt stage lights for long periods of time) so don’t be surprised if they don’t melt like the beads to.  The color should still spread out throughout the mold as the beads melt.

Once the beads have melted take the mold out of the oven and give it plenty of time to cool.  Remove the foil and you should end up with a translucent block of plastic:

DSC_0023

If you’re not happy with your first attempts then don’t fret.  You can always break up the plastic blocks using a hammer and then melt them down again in new forms.  Add more beads and/or pieces of gel to get them to look more like what you want.

The next important aspect of making a good fake fire is making a good flickering light effect.  If you’re doing this in a theater and you have a good quality DMX-based lighting system you might be able to program an effect to simulate this, but that’s a lot of work and can be a hassle if it has to be added to multiple cues.  After hunting around a bit I found a product called FauxFlame which is an electrical device you wire to an incandescent light to make it flicker randomly.  I bought a couple of these to add to my inventory of lighting toys and wired them into a couple electrical boxes so I can plug any light into them that I want.

The theater had an existing hearth with a few lights mounted inside it.  I installed a couple regular household incandescent bulbs wrapped in orange/yellow gels in the hearth, then put a dozen or so plastic embers on top, along with some fake fireplace logs that were bought from a local hardware store.  The lights were plugged into a FauxFlame and the result is quite impressive.  Here are a few photos and a link to a video showing the effect in action.  The set isn’t complete yet, so pardon the appearance of the fireplace.

IMG_0163

IMG_0158

IMG_0157

IMG_0156

And here’s a video of the fireplace in action: