The information on this page explains how I installed a Sirius satellite radio receiver in a 2006 Toyota Highlander Hybrid with the navigation option. With little modification these instructions should also allow for installation of an XM satellite radio, and should also work for other models of Toyota Highlanders with the navigation option. I was able to obtain useful information from the forums at Toyota Nation and HiHyChat.com, so if you have any questions about your car (related to this installation or not) I suggest you post them there.
Originally published November 26, 2005. Last updated June 24, 2006.
DISCLAIMER
This web site and the information it contains is provided as a public service. The author makes no claims, promises or guarantees about the accuracy, completeness, or adequacy of the contents of this website and expressly disclaims liability for errors and omissions in the contents of this web site. No warranty of any kind, implied, expressed or statutory, including but not limited to the warranties of non-infringement of third party rights, title, merchantability, fitness for a particular purpose and freedom from computer virus, is given with respect to the contents of this web site or its hyperlinks to other Internet resources. Reference in this web site to any specific commercial products, processes, or services, or the use of any trade, firm or corporation name is for the information and convenience of the public, and does not constitute endorsement, recommendation, or favoring by the author.
Background
Toyota currently doesn’t offer integrated satellite radio in the Highlander, however the Highlander is based on the Camry chassis and Toyota is offering satellite radio in that model. If you have a Highlander with the Navigation option then with only a minor modification to the wiring harness for your radio you can add a Camry satellite option to your Highlander very easily. Note that this requires some delicate wiring work so I suggest you read through this information carefully before deciding whether or not to undertake this task. Once installed, the satellite radio is fully integrated with your existing radio controls. Repeatedly pressing the AM radio button will cycle between 3 pages of satellite presets, and the buttons on the steering wheel will also work as expected.
What to purchase
At the very minimum you will need to purchase a Sirius radio and wiring harness from Toyota for a Camry. The radio is part # PTS31-00052 (an older version was apparently PTS31-00050), and the wiring harness (referred to as a “fit kit”) is part # PTS31-00051. The radio costs approx. $180 and the fit kit is approx. $90. You can purchase the radio and fit kit directly from your Toyota dealer, and you can also find them for sale from places that resell Toyota parts and accessories. Just do a search for one of the part numbers on Google and you should be able to locate some.
The fit kit includes an antenna that mounts to the inside of a window, which reportedly doesn’t have very good reception at times. A better option is to also purchase an external antenna that you can mount on the roof, such as the Terk SIRMINI, which is a magnetic mount antenna that you can buy for $35 at many electronics stores that carry car audio equipment. The Terk antenna needs a slight modification for it to work with the Toyota Sirius radio – more on this below.
Tools
The most important tool you’ll need is a 10mm socket wrench with an extension that’s 6″ or longer. Depending on where you decide to install the radio and how to run the wires you may want/need other tools as well.
Getting started
Before you actually get started here are some pictures of what you should have so that you can familiarize yourself with it all. Click on the images to see larger ones:
The Sirius radio receiver, from both sides so you can see the wiring harness plug and antenna plug. Those are the only two wires that attach to the radio:
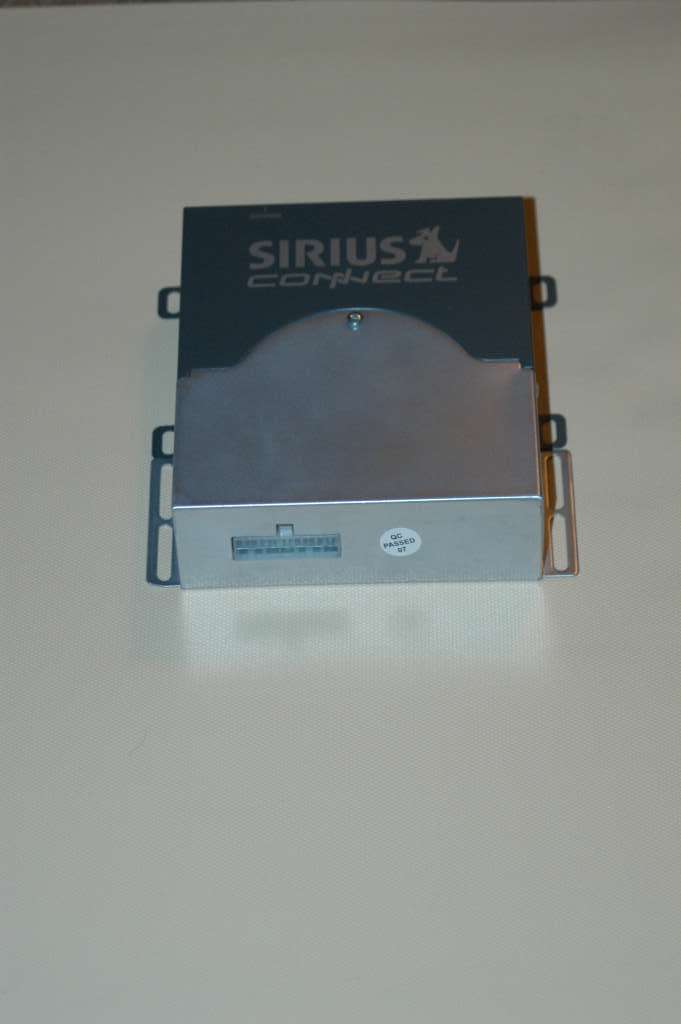
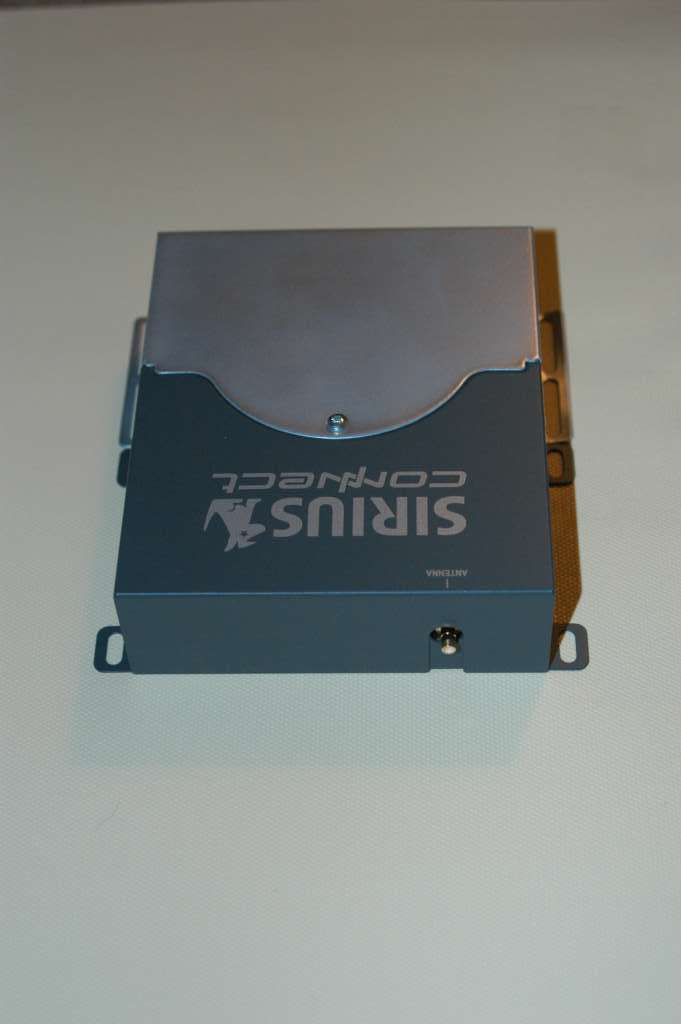
On the bottom of the radio is a barcode with your Sirius serial number (the SIN). The radio should have also come with a sticker containing that number. Make sure you keep a copy of that number since you need it to activate the radio. If you forget to write down the SIN or lose that sticker then you’ll need to pull the radio out again in order to get the number to activate the radio.
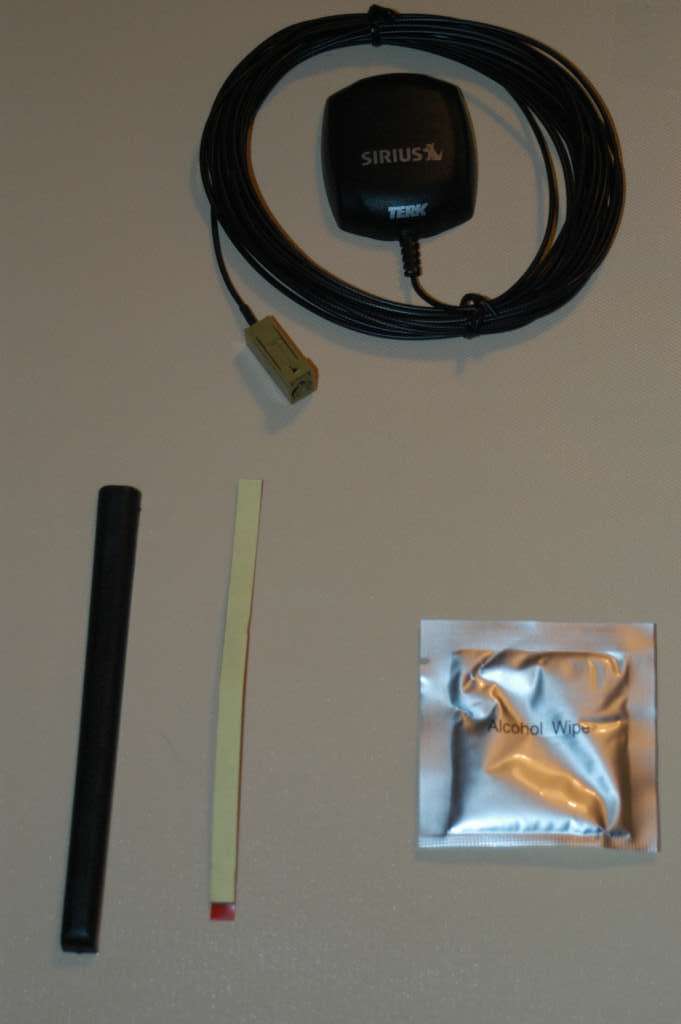
The wire that connects the receiver to your radio/navigation system and an optional mounting bracket:

The window-mount antenna and double-sided tape that comes with the fit-kit. You won’t actually use this if you decide to use the Terk SIRMINI or another antenna more suited for the Highlander.

The Terk SIRMINI optional antenna. It includes a plastic strip & adhesive strip for laying the wire on the roof of your car and an alcohol wipe to use before installation:
Really Getting Started
IMPORTANT: Before starting any work on your car be sure to disconnect your battery. Failure to do this could result in damage to electrical equipment if you are not extremely careful!
The first thing you will want to do is determine where you want to physically locate the radio. Here are three good locations you can choose from:
- Underneath the front passenger seat. This would require cutting the carpet underneath the seat if you want to ensure the radio doesn’t move around.
- Forward of the center console near the drivers right foot. There is a void here that is easy to access from either side by removing two plastic tabs and sliding the panel forward.
- Underneath the center console, directly underneath the cup holder. There is a void here that is easy to access and is a perfect location for the radio. This is the location I chose and all the pictures and information that follows is based on using this as the location of your radio.
Picking the location will dictate how you run the antenna and wiring harness to the radio. Choosing to install the radio under the center console provided a location that didn’t need any fancy mounting of the radio nor any difficult running of wires.
Removing the Radio/navigation Unit
Removing the radio/navigation unit is fairly easy. There is a single piece of molding that encircles the entire unit, with 8 friction clips holding it in place. See the image in the middle of this page for their locations. Simply pulling the bottom of the trim with consistant pressure should be enough to release the bottom, then gently work your way around both sides to the top.
The radio/nav unit with the trim removed:

Using a 10mm socket wrench, remove the 6 bolts that hold the unit in place. Gently lift the unit up over the gear shift lever and unplug all the cables so that you can remove it. All the plugs on the back are different shapes & sizes so you don’t need to worry too much about what goes where – it’ll be obvious when the time comes to re-install it.
The dash with the radio/nav removed:
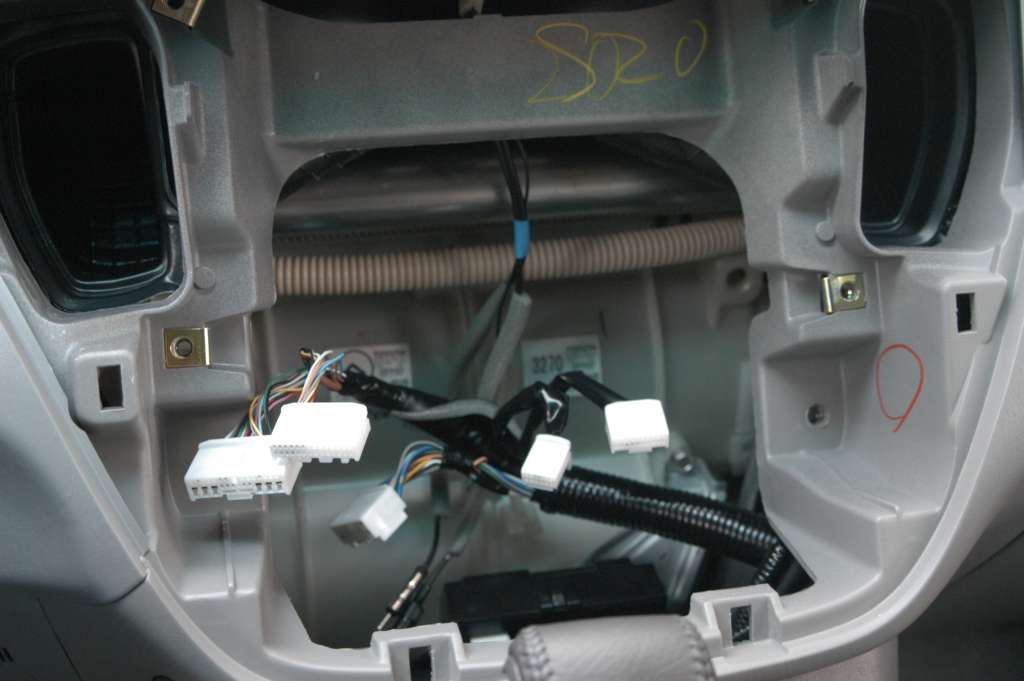
The back of the radio/nav unit:
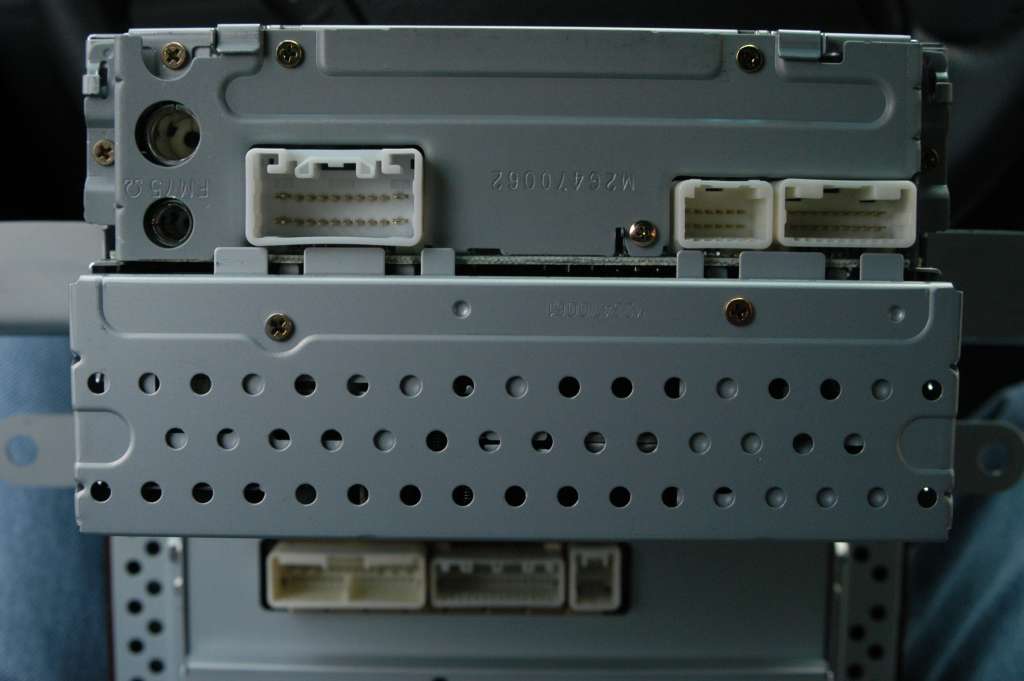
Sockets R22 and R23 are the two in the upper right. R22 is where the Sirius radio will connect to the radio. If you have a wiring harness that contains both a male and female plug for R22 (see the update below) then it’s just a simple matter of plugging that cable in between R22 and the cable that was originally plugged into R22.
If you have a cable that only has a single R22 plug on it then you will need to move the two wires from pins 9 and 10 on R22 to pins 9 and 10 on R23 in order to free up R22 for the Sirius cable. Moving the wires between the two plugs, if you need to do it, is probably the most difficult part of the entire project. If you have really good eyes (and possibly a magnifying glass) you will be able to locate a 1 in a small circle near pin 1 on each plug. If you want to be absolutely certian that you are moving the wires to the correct positions simply use a multimeter to verify the pins in the sockets.
First you need to carefully remove the wires and the sockets crimped on their ends from R22. To do this you first pry the retaining clip up from the center of the plug. using the tip of a knife blade or a small screwdriver. You can only pry it up a little bit, about 1/8 of an inch. You then need to use a very small metal pin and push it in the tiny hole above each socket hole. This will push down a tiny barb on the crimped socket so that you can gently pull it out. I can’t stress how careful you have to be not to damage the barb or you won’t be able to properly insert it into R23 so that it will stay there. If you are unable to remove the socket then you can try cutting it out since you won’t need the R22 plug any more. If you choose this method, however, you MUST be very careful not to damage the wires or the sockets crimped onto the end.
Once you have successfully removed the two wires from R22 you’ll need to install them into R23. Once again pry up the retining clip on top of R23 like you did with R22. Slide the ends of the wires into their respective locations as far as you can then push the retaining clip back into place.
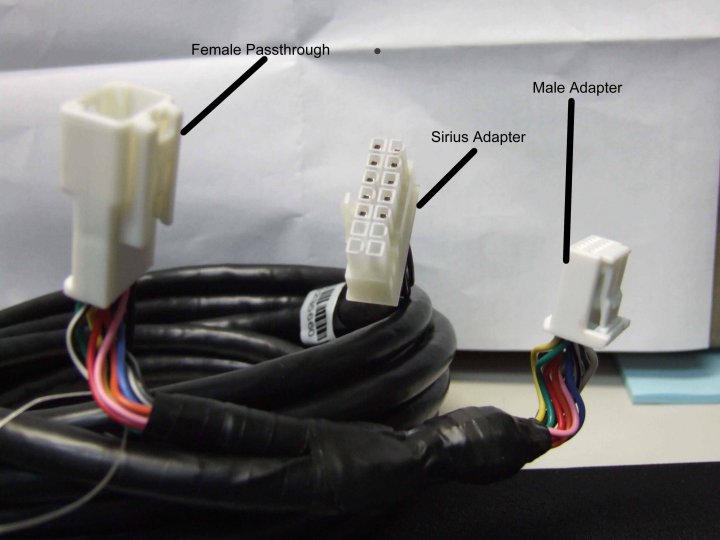
Update (2006/04/05) : I have been told that Toyota has kits that contains a ‘Y’ harness that you can use instead of having to manually perform this rewiring. So far I’ve only learned that Toyota part # PT546-07051 corresponds to an XM radio kit for the Toyota Avalon that includes this Y adapter. So if you are installing an XM radio you probably want to order this item from the dealer. If anybody knows of the correct part # for a Sirius kit that includes a ‘Y’ harness please let me know so I can post it here.
Update: (2006/06/16) : I just got an e-mail (thanks Keith!) indicating that you can get a Sirius wiring harness from here that will work without needing to make any wiring changes. The Toyota part number is PTS31-07050. Here’s a picture of the harness:
Installing the Sirius Wiring Harness
As I mentioned above, I decided to place the Sirius receiver in the void underneath the center console. Slide the driver and/or passenger seat back as far as you can and position yourself so that you’re looking through the open area underneath the center console. There is an angled piece of plastic that runs horizontal and then upwards towards the rear of the car. You can simply pry this up and pull it out with your bare hands. This will open up the void underneath the center console.
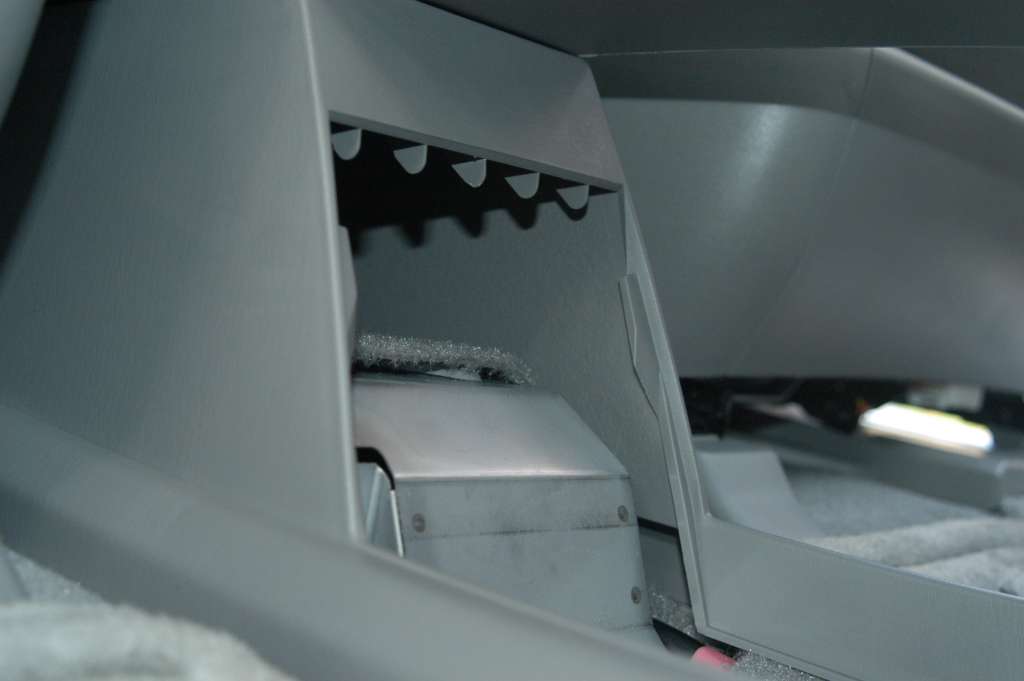
The center console hiding place with its cover in the foreground:
And looking back into the void:
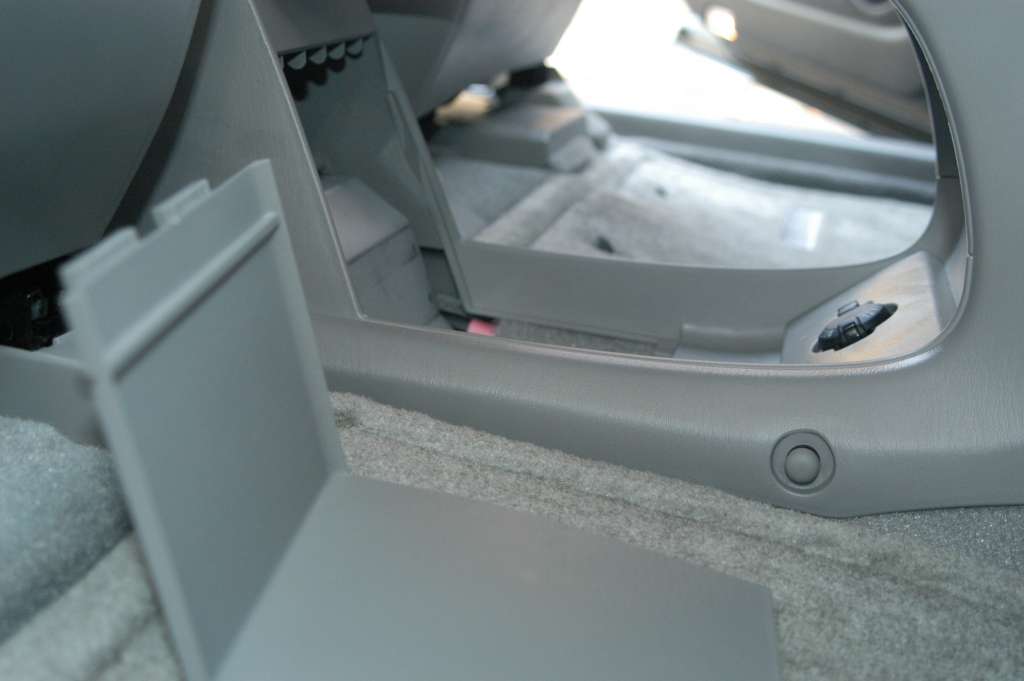
Forward of this is a panel with a 12-volt accessory outlet in it. You’ll also want to pull this out:
(viewed from the other direction)
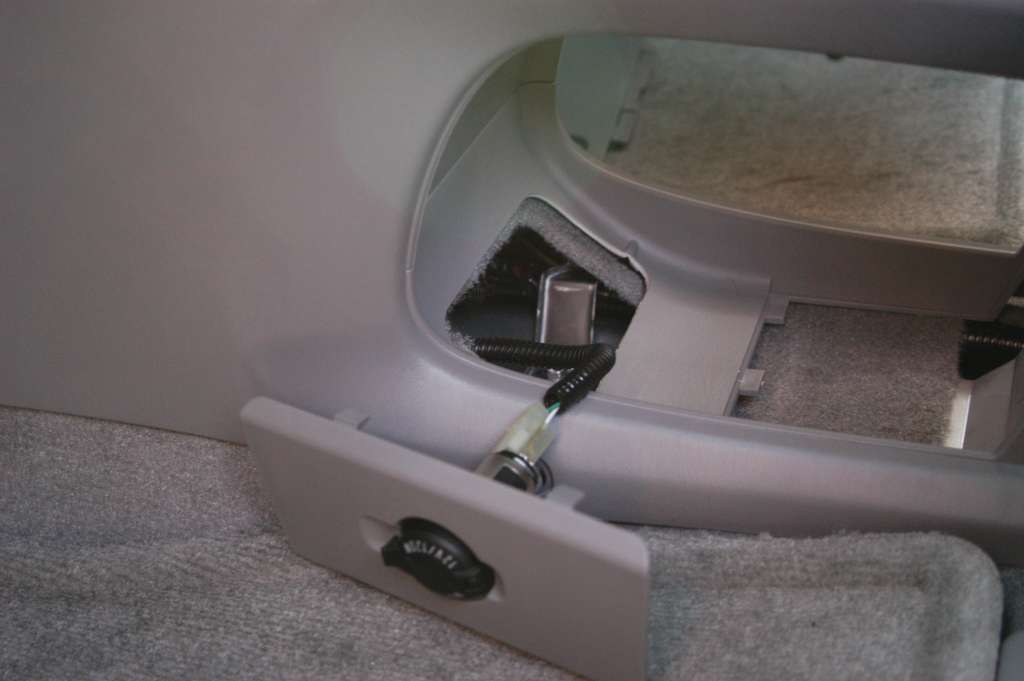
Take the wiring harness and feed the R22 plug up underneath where the accessory outlet is located. If you have a small enough arm you’ll be able to reach down through the opening in the dash and pull the wire up. You only need to feed up enough to reach the radio. The rest can be stowed in the center console along with the receiver.
Installing the Antenna
If you are installing the Terk SIRMINI antenna you will first need to remove the plastic housing around the antenna connector. With the plastic housing on the antenna won’t properly connect to the Sirius receiver. I simply used a pair of wire cutters to start snipping the plastic until enough was removed that the rest just broke away.
The Terk antenna connector as it is when you buy it:
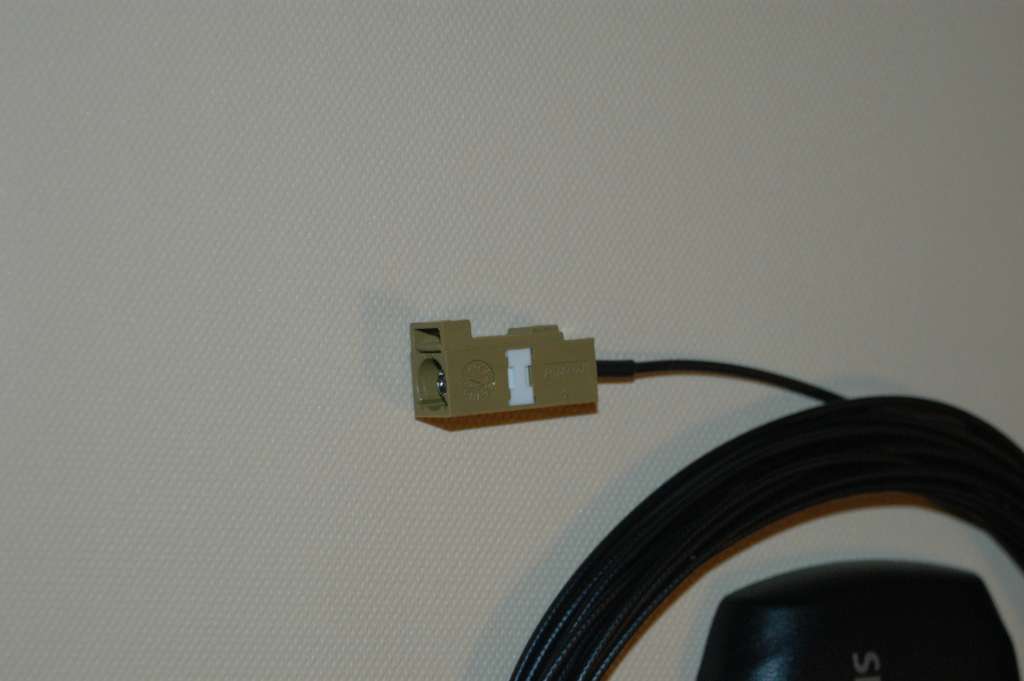
The connector after removing the plastic housing:

Mount the antenna on the roof of the car following the instructions that came with it. I chose the rear of the car right in the middle. After installing the antenna I ran the wire down the side of the rear hatchback. The wire itself fit nicely underneath the outside of the doors gasket:

Once I got the wire down to the rear light assembly I fed it through to the inside of the car. To do this I had to loosen the three 10mm bolts holding the light assembly in place. Just open the panel inside the back of the car and you’ll spot the bolts:
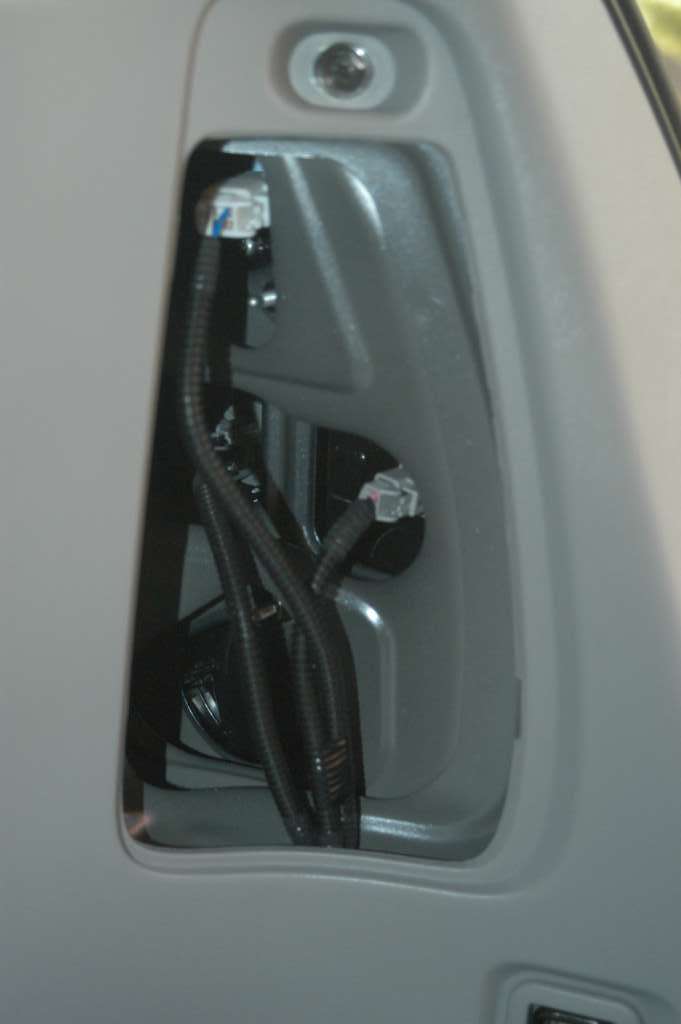
From there I removed the jack and the tray that the jack sits in so that I could start running the wire forward. There is a bolt you’ll need to unscrew and a couple plastic fastners that you can pop out with a screwdriver to remove the jack tray:
The jack tray:
And what it looks like after it’s been removed:
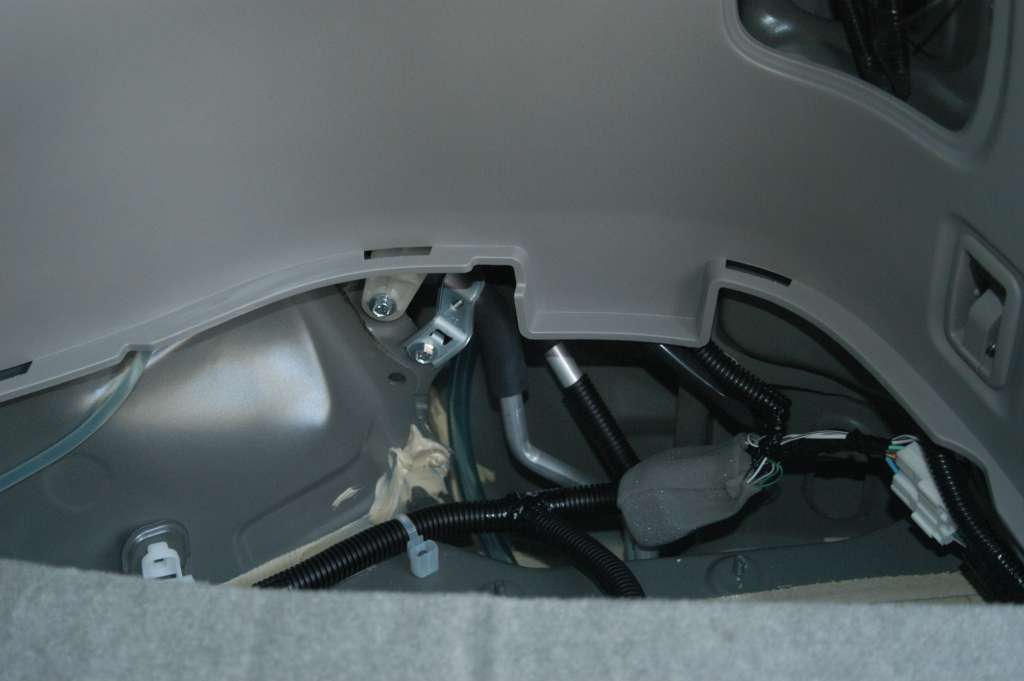
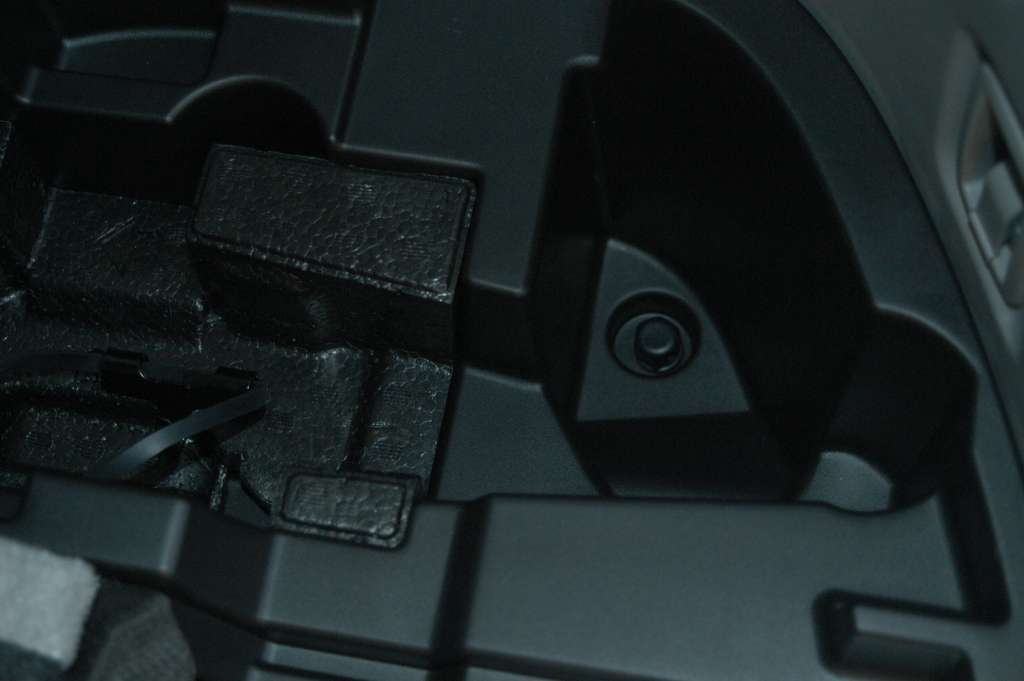
From the forward part of this opening you can start feeding the wire under the third-row seats:
From here I’ll leave it up to you to run it up to the receiver. I didn’t find it all that difficult to push it underneath the passenger side doorway trim in order to hide it. Once it’s up near the front seat just run it under the floor mat to the center console, then underneath the bottom lip of the console.
Now that you’ve got both the antenna and the wiring harness routed to the center console it’s just a matter of plugging them both into the Sirius receiver then putting it inside the center console. I didn’t bother to physically attach the receiver since the extra wire of the wiring harness filled the space up enough that it couldn’t really slide around. Push the plastic cover over the receivers hiding place, replace the accessory outlet, and you’ll never know the receiver is there.
Now it’s time to replace the radio/navigation unit. Simply plug everything back in as it was before, but now plug R22 from the Sirius into the appropriate socket. As I mentioned above, it should be painfully obvious where everything plugs in since all the plugs & sockets are different shapes and sizes. Bolt the unit back into place, replace the trim, and you’re done! Once you’ve activated your radio with Sirius you should be able to start using it. Press the Audio button to display the radio controls then press the AM button multiple times. You should see the display cycle among AM, SAT1, SAT2, and SAT3. From those pages you can program in your favorite Sirius channels.
The photographs at Factory Interactive show what the screen will look like when operating properly. Unfortunately the text for both the title and name get truncated to 10 characters, but hey, if you’re driving then you shouldn’t be reading them anyway! I feel it’s a small price to pay for having a fully integrated Sirius radio.